Federated Learning Tensorflow tutorial
This tutorial demonstrates the usage of Federated Learning with the goal of training a machine learning model with data from different users without having users share their data. The steps are done in a low code environment with the UI and with a Tensorflow framework.
This is a step-by-step tutorial for running a UI driven Federated Learning experiment. To see a code sample for an API driven approach, see Federated Learning Tensorflow samples.
In this tutorial, admin refers to the user that starts the Federated Learning experiment, and party refers to one or more users who send their model results after the experiment is started by the admin. While the tutorial can be done by the admin and multiple parties, a single user can also complete a full runthrough as both the admin and the party. For a simpler demonstrative purpose, in the following tutorial only one data set is submitted by one party. For more information on the admin and party, see Terminology.
In this tutorial, you will complete these tasks:
- Task 1: Start Federated Learning as the admin
- Task 2: Train model as a party
- Task 3: Save and deploy the model online
Preview the tutorial
Watch this short video tutorial of how to create a Federated Learning experiment with watsonx.ai Studio.
This video provides a visual method to learn the concepts and tasks in this documentation.
Prerequisites
Verify the Python version
Ensure that you are using the same Python version as the admin. Using a different Python version might cause compatibility issues. To see Python versions compatible with different frameworks, see Frameworks and Python version compatibility.
Open a project
-
Use an existing project or create a new one. You must have at least admin permission.
-
Associate the watsonx.ai Runtime service with your project.
- In your project, click the Manage > Service & integrations.
- Click Associate service.
- Select your watsonx.ai Runtime instance from the list, and click Associate; or click New service if you do not have one to set up an instance.

Task 1: Start Federated Learning as the admin
In your project, you will create a Federated Learning experiment with a Tensorflow framework using the MNIST data set.
Task 1a: Define the experiment details
-
In your project, click the Assets tab in your project.
-
Click New asset > Train models on distributed data to create the Federated learning experiment asset.
-
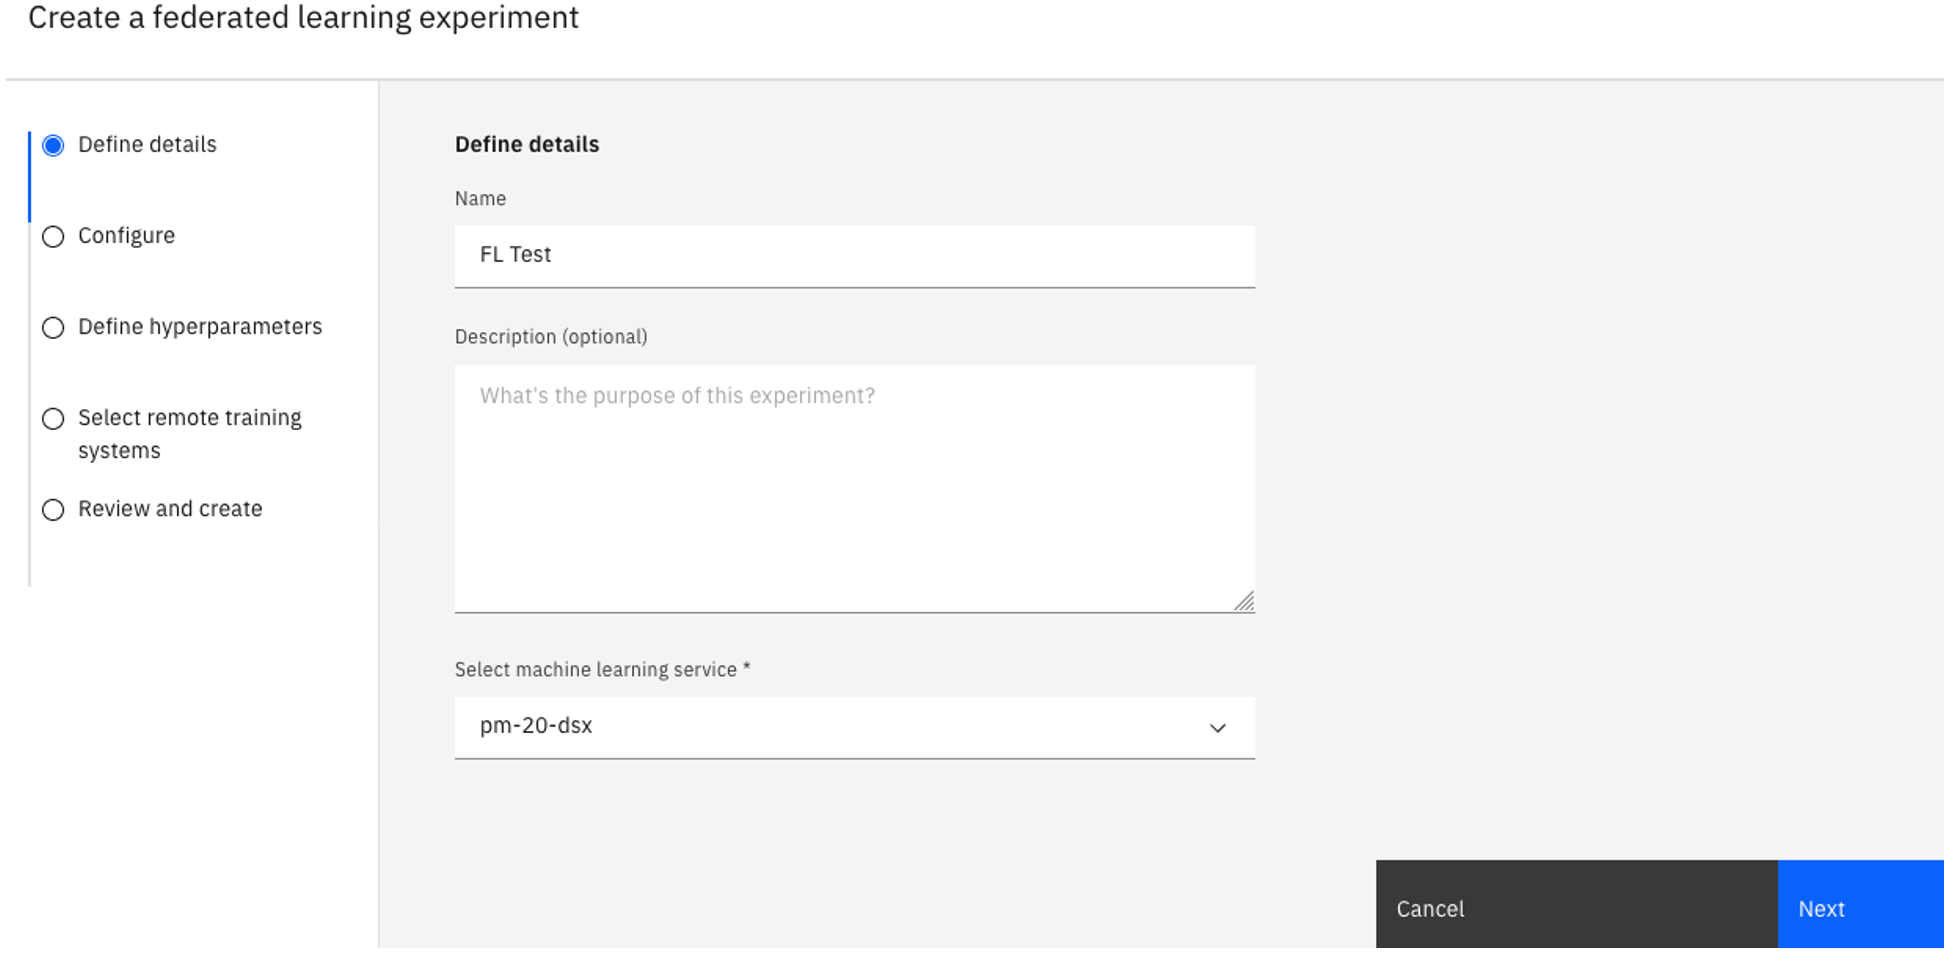
Type a Name for your experiment and optionally a description.
-
Verify the associated watsonx.ai Runtime instance under Select a machine learning instance. If you don't see a watsonx.ai Runtime instance associated, follow these steps:
-
Click Associate a Machine Learning Service Instance.
-
Select an existing instance and click Associate, or create a New service.
-
Click Reload to see the associated service.
-
Click Next.
-
Task 1b: Configure the experiment
-
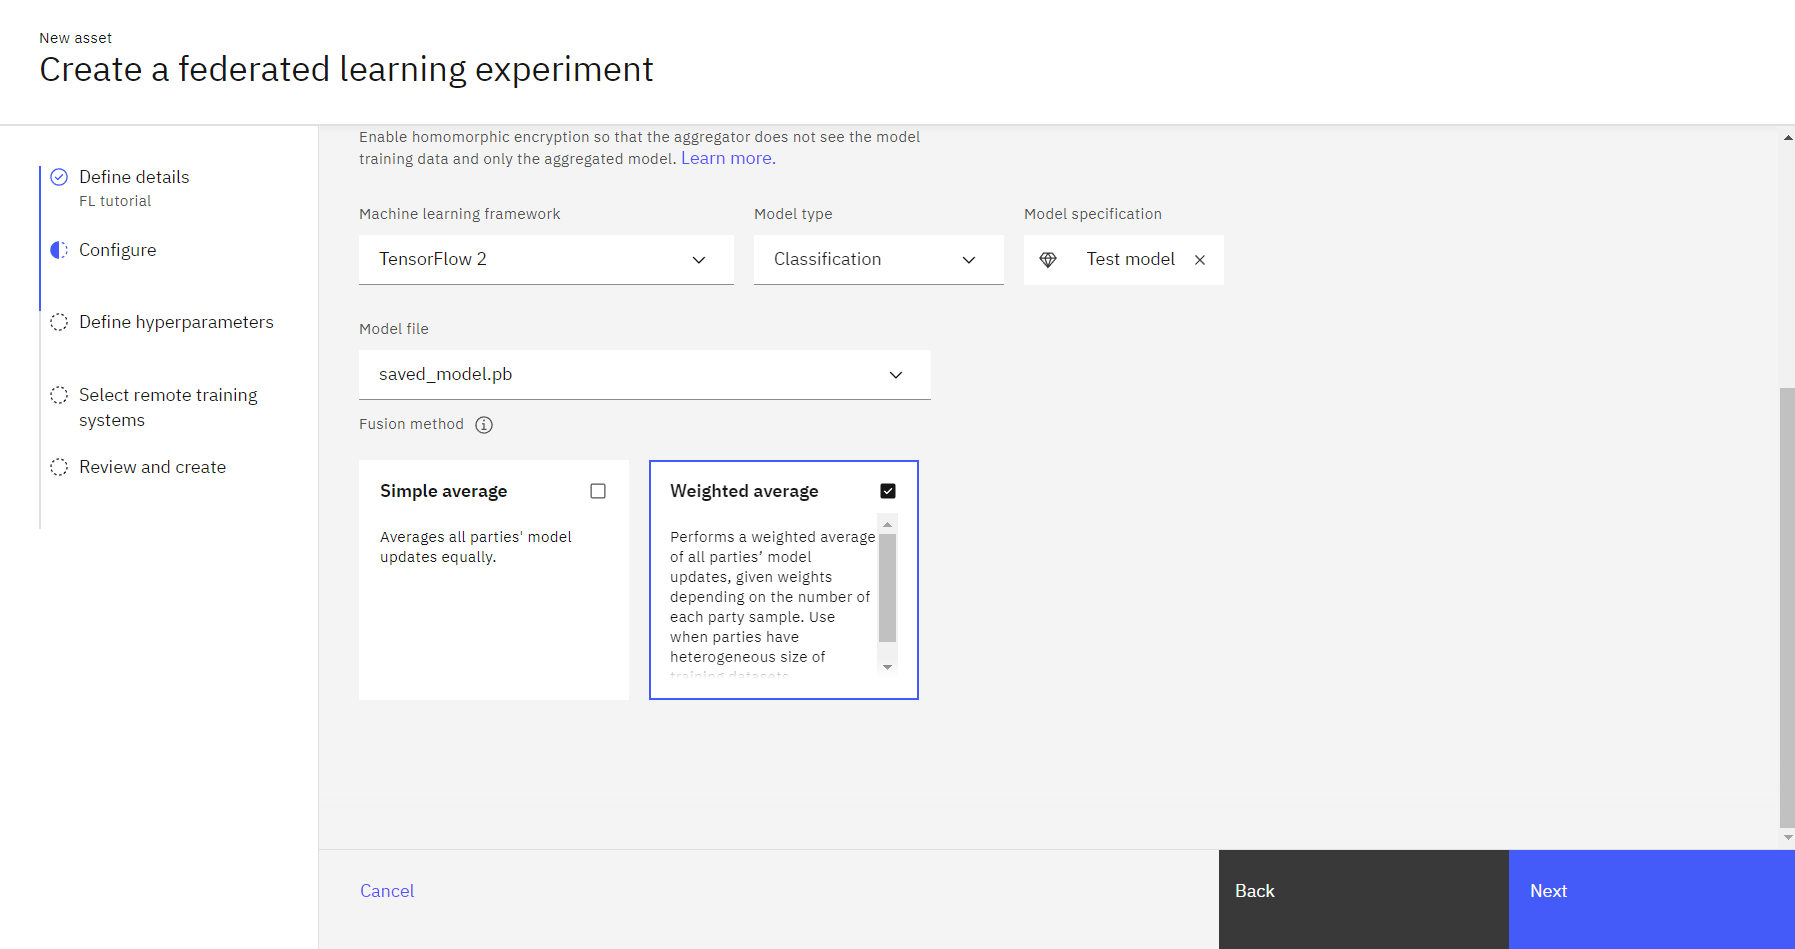
On the Configure page, select a Hardware specification.
-
For Machine learning framework, select Tensorflow 2.
-
Select Classification for the Model type.
-
Download the untrained model.
-
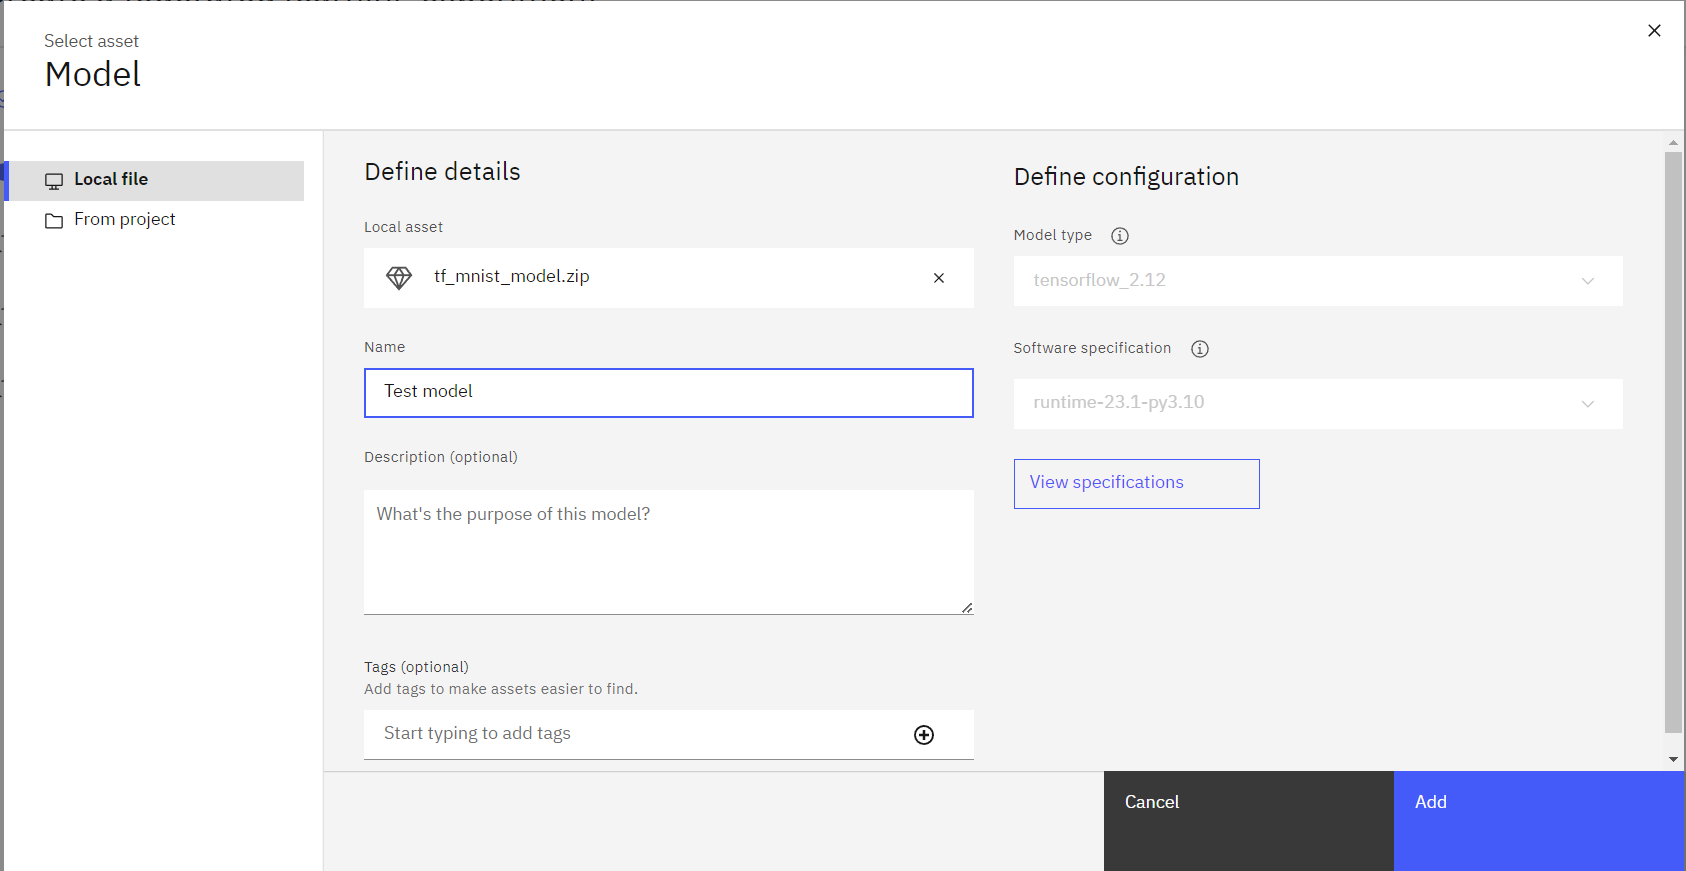
Back in the Federated Learning experiment, click Select under Model specification.
-
Drag the downloaded file named
tf_mnist_model.ziponto the Upload file box. -
If necessary, select runtime-23.1-py3.10 for the Software Specification dropdown.
-
Type a name for your model, and then click Add.
-
-
Click Weighted average for the Fusion method, and click Next.
Task 1c: Define the hyperparameters
-
Accept the default hyperparameters or adjust as needed.
-
When you are finished, click Next.
Task 1d: Select remote training systems
-
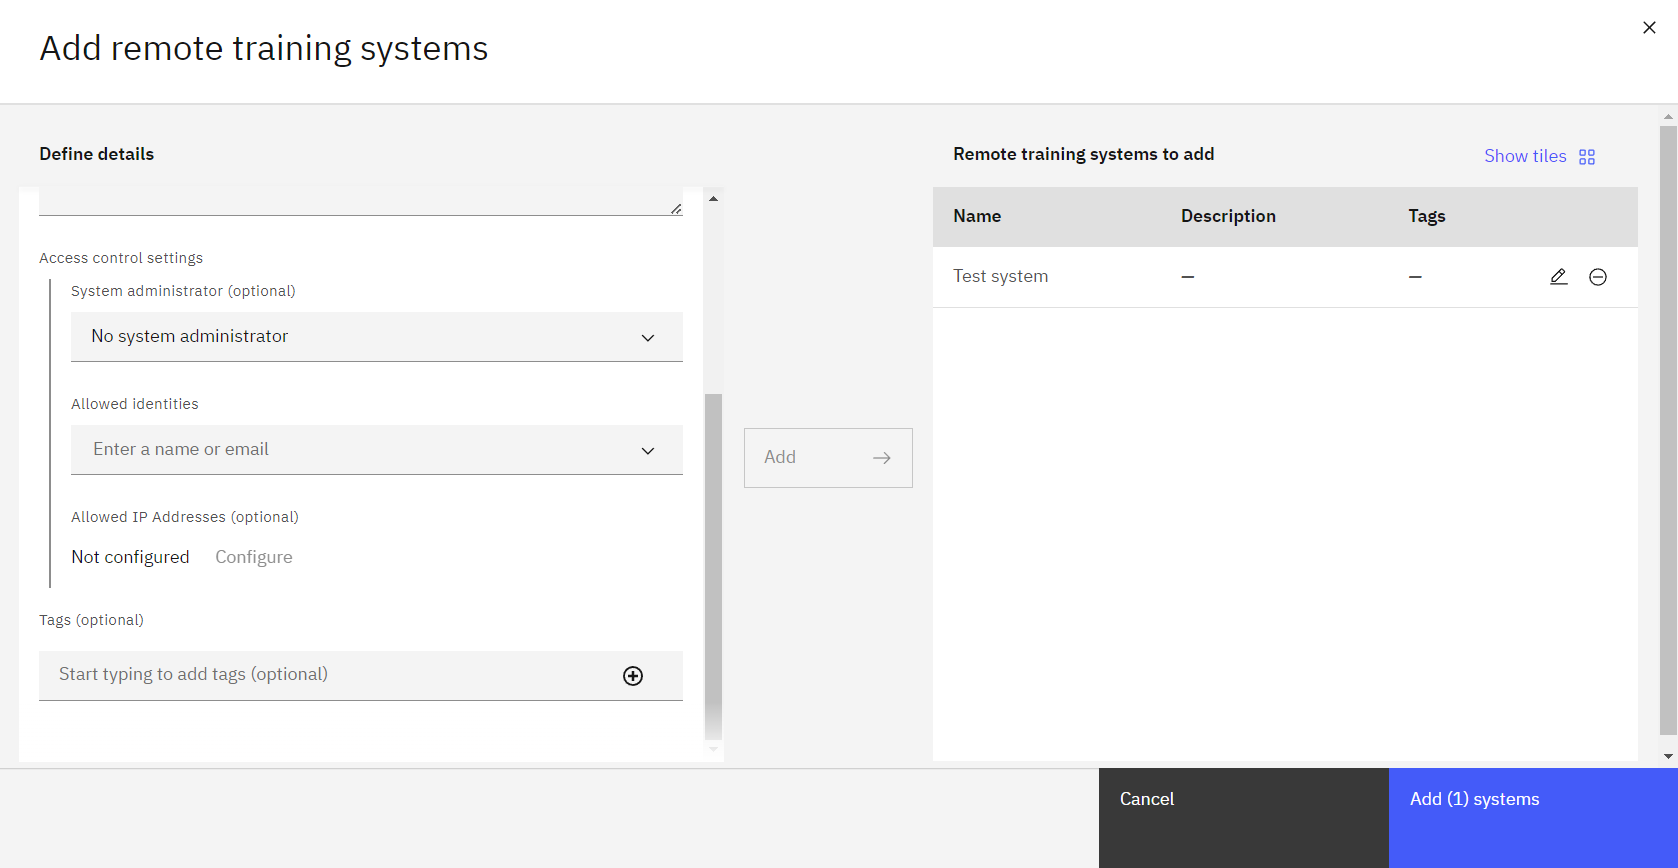
Click Add new systems.

-
Type a name for your Remote Training System.
-
Under Allowed identities, choose the user that is your party, and then click Add. In this tutorial, you can add a fictitious user or yourself, for demonstration purposes.
This user must be added to your project as a collaborator with Editor or higher permissions. Add additional systems by repeating this step for each remote party you intent to use. -
When you are finished, click Add systems.
-
Return to the Select remote training systems page, verify that your system is selected, and then click Next.
Task 1e: Review your settings
-
Review the settings. and click Create.
-
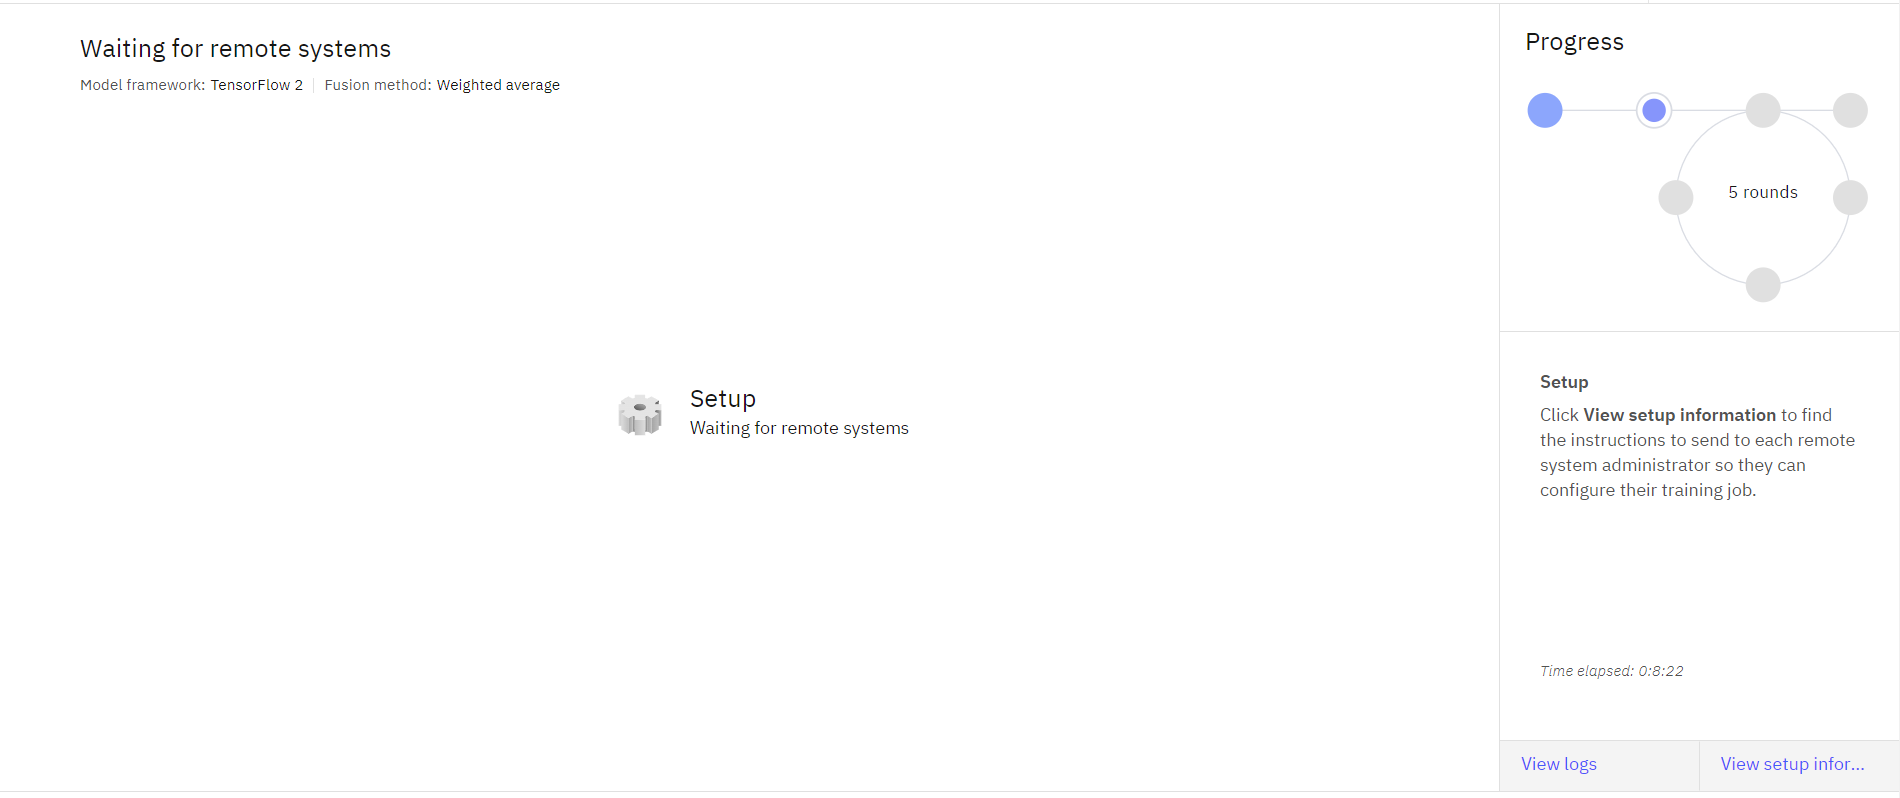
Watch the status. Your Federated Learning experiment status is Pending when it starts. When your experiment is ready for parties to connect, the status will change to Setup – Waiting for remote systems. This may take a few minutes.
-
Click View setup information to download the party configuration and the party connector script that you can run on the remote party.
-
Click the Download config icon
beside each of the remote training systems that you created. Save the party connector script to a directory on your machine with the name
remote-test-system-configuration.py.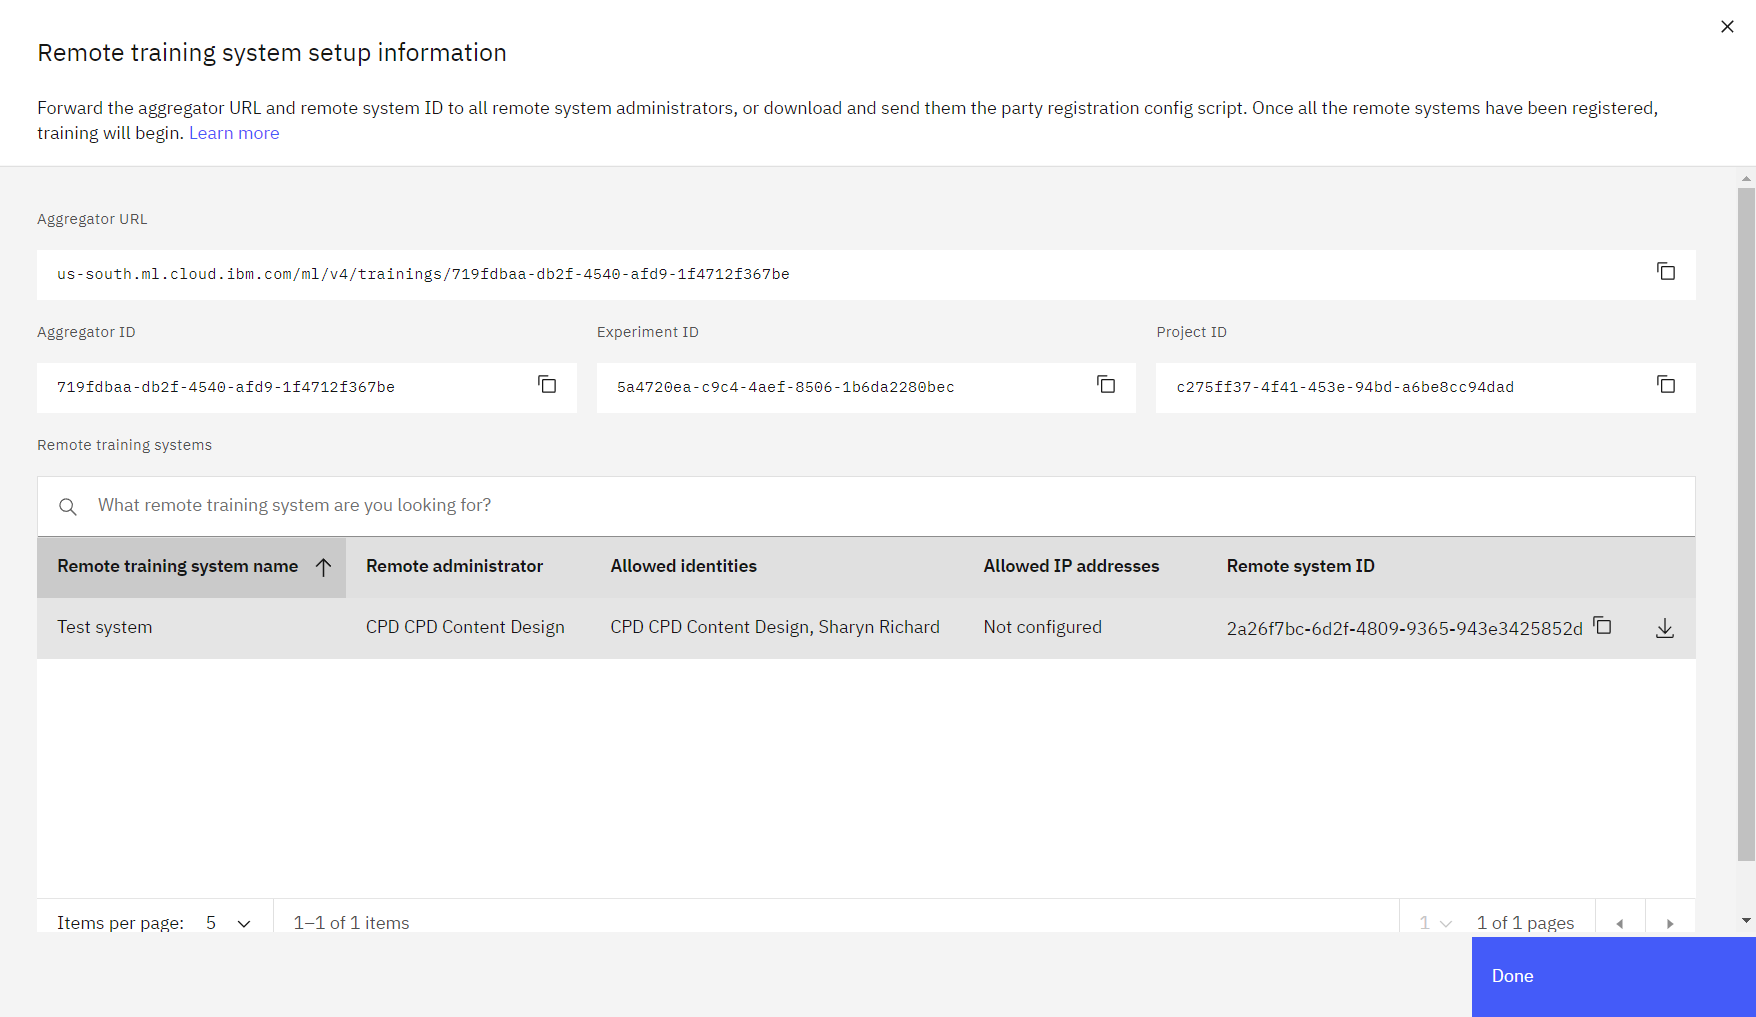
-
Click Done.
 Check your progress
The following image shows the experiment with status 'waiting for remote systems'.
Task 2: Train model as the party
To train the model, you need to download the data sets, and then edit and run python scripts. Follow these steps to train the model as a party:
Task 2a: Download the data sets and scripts
-
Create a new local directory, and put move the party connector script that you downloaded in Task 1e into the new directory.
-
Download the data handler mnist_keras_data_handler.py by right-clicking on the file name, and then click Save link as. Save it to the same directory as the party connector script.
-
Edit the data handler python script to change
ibm_watson_machine_learningtoibm_watsonx_ai. -
Save the file.
-
-
Download the MNIST handwriting data set from our Resource hub. In the the same directory as the party connector script, data handler, and the rest of your files, unzip it by running the unzip command
unzip MNIST-pkl.zip.
You now have the party connector script,mnist_keras_data_handler.py,mnist-keras-test.pklandmnist-keras-train.pklin the same directory.
Task 2b: Install watsonx.ai Runtime
-
If you are using Windows or Linux, run the following command:
pip install 'ibm_watsonx_ai[fl-rt23.1-py3.10]' -
If you are using Mac OS with M-series CPU and Conda, download the installation script and then run:
./install_fl_rt23.1_macos.sh <name for new conda environment>
Task 2c: Edit and run the party connector script
Your party connector script looks similar to the following script:
from ibm_watsonx_ai import APIClient
wml_credentials = {
    "url": "https://us-south.ml.cloud.ibm.com",
    "apikey": "<API KEY>"
    }
wml_client = APIClient(wml_credentials)
wml_client.set.default_project("XXX-XXX-XXX-XXX-XXX")
party_metadata = {
            wml_client.remote_training_systems.ConfigurationMetaNames.DATA_HANDLER: {
            # Supply the name of the data handler class and path to it.
            # The info section may be used to pass information to the
            # data handler.
            # For example,
            #     "name": "MnistSklearnDataHandler",
            #     "path": "example.mnist_sklearn_data_handler",
            #     "info": {
            #         "train_file": pwd + "/mnist-keras-train.pkl",
            #         "test_file": pwd + "/mnist-keras-test.pkl"
            #     }
                "name": "<data handler>",
                "path": "<path to data handler>",
                    "info": {
                        "<information to pass to data handler>"
                    }
                }
            }
party = wml_client.remote_training_systems.create_party("XXX-XXX-XXX-XXX-XXX", party_metadata)
party.monitor_logs()
party.run(aggregator_id="XXX-XXX-XXX-XXX-XXX", asynchronous=False)
Edit the party connector file, remote-test-systm-configuration.py, and make the following changes:
-
Provide your credentials: Paste the API key for the user defined in the remote training system. If you don't have an API key, go to the IBM Cloud API keys page, and click Create API key, fill out the fields, and click Create.
-
In the party_metadata field, provide the name, path, and info, which should be similar to the following JSON text.
"name": "MnistTFDataHandler", "path": "mnist_keras_data_handler.py", "info": { "train_file": "mnist-keras-train.pkl", "test_file": "mnist-keras-test.pkl" } -
Save the party connector script.
-
Run the party connector script using either
pythonorpython3depending on what you have installed.python remote-test-system-configuration.py
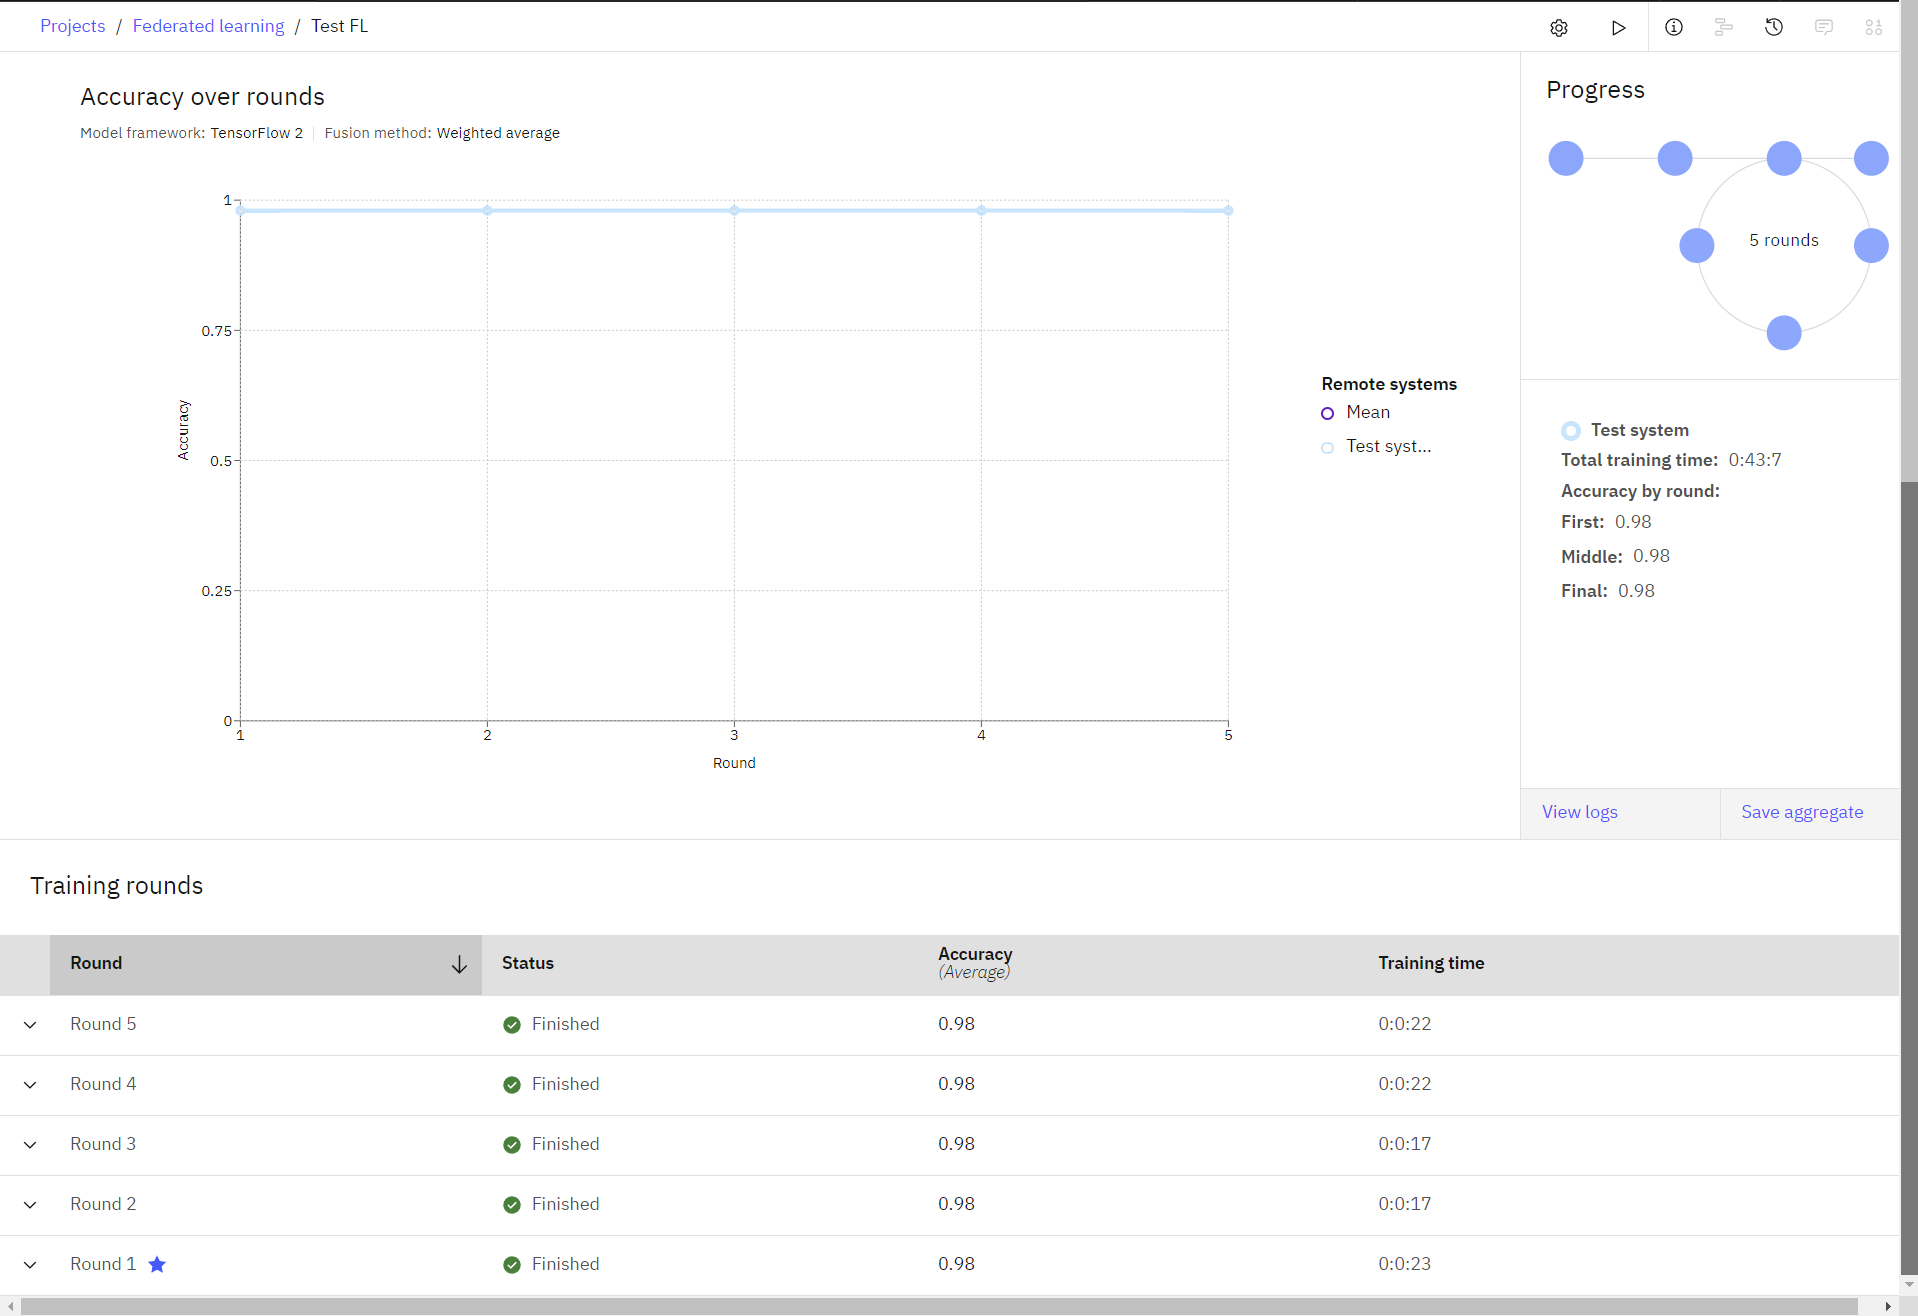
From the UI you can monitor the status of your Federated Learning experiment.
 Check your progress
The following image shows the completed experiment.
Task 3: Save and deploy the model online
In this section, you will learn to save and deploy the model that you trained.
Task 3a: Save your model
- In your completed Federated Learning experiment, click Save aggregate.
- On the Save aggregated model to project screen, type a name for the model. and click Create.
- When you see the notification that the model is created, click View in project. If you miss the notification, then click the project name to return to the assets tab, and click the model name to view it.
Task 3b: Promote the model to a space
- From the model details page, click Promote to deployment space
.
- Choose a Target space from the list, or create a new deployment space.
-
Select Create a new deployment space.
-
Type a name for the deployment space.
-
Select your storage service.
-
Select your machine learning service.
-
Click Create.
-
When the deployment space is created, close the window.
-
- Select the Go to the model in the space after promoting it option.
- Click Promote.
Task 3c: Create and view the online deployment
- When the model displays inside the deployment space, click New deployment.
- Select Online as the Deployment type.
- Specify a name for the deployment.
- Click Create.
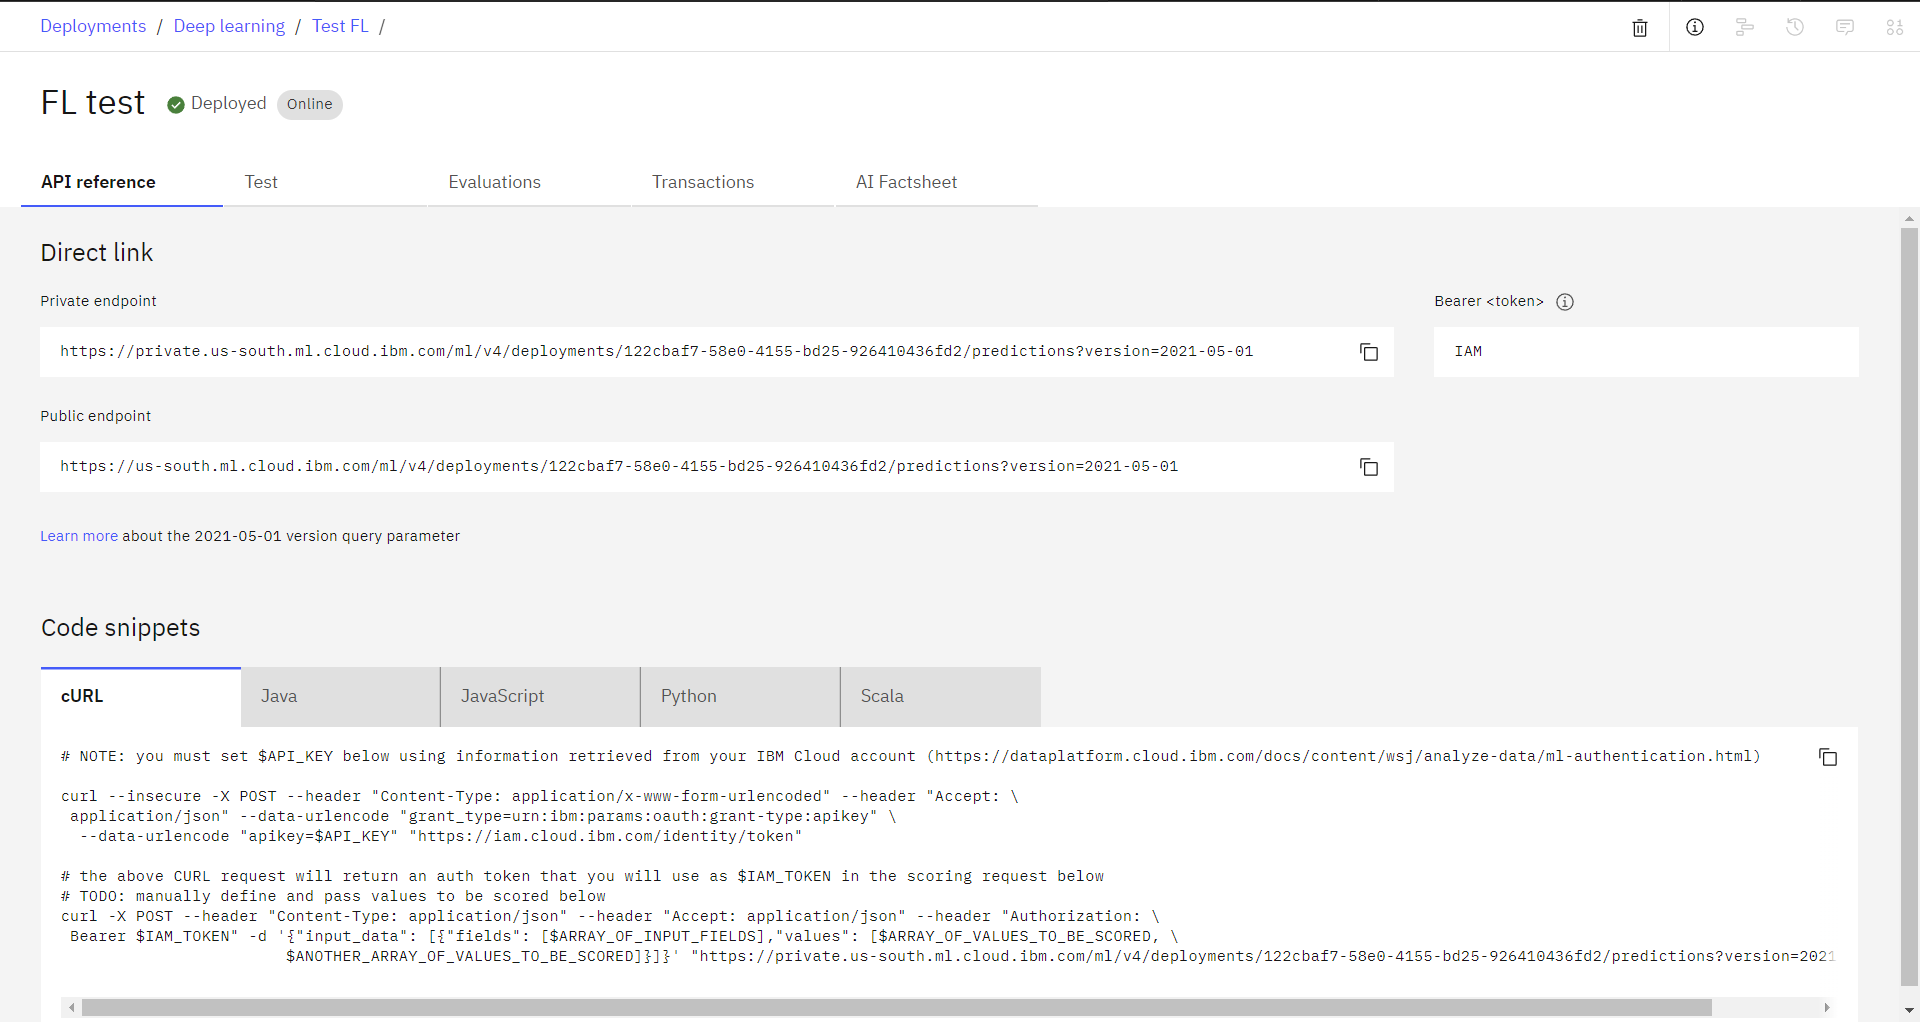
- Wait for the deployment status to change to Deployed, and then click the deployment name.
- View the endpoints and code snippets to use this deployment in your application.
 Check your progress
The following image shows the deployment.
Next steps
Ready to create your own customized Federated Experiment? See the high level steps in Creating your Federated Learning experiment.
Parent topic: Federated Learning tutorial and samples